> ## Documentation Index
> Fetch the complete documentation index at: https://docs.formo.so/llms.txt
> Use this file to discover all available pages before exploring further.
# MCP API Key
> Connect MCP clients to Formo with a Workspace API Key.
## Overview
Use Workspace API Key authentication for MCP clients that let you configure custom HTTP headers, local editor integrations, or stdio bridges such as `mcp-remote`.
OAuth is also available for MCP clients that manage user sign-in. See [MCP OAuth](/mcp/oauth).
The MCP endpoint is:
```text theme={null}
https://api.formo.so/v0/mcp/
```
Keep the trailing slash in `/v0/mcp/`. Do not use `https://api.formo.so/` as the MCP server URL.
MCP requires a **Scale or Enterprise** plan. Connections from Free or Growth workspaces are rejected with a `403` error, even with a valid API key. [Upgrade your workspace](https://app.formo.so) to enable MCP access.
## Create an API key
1. Go to your [Formo workspace settings](https://app.formo.so)
2. Navigate to **Settings** → **API Keys**
3. Click **Create API Key**
4. Enable the **MCP** scope
5. Copy the generated key
Use the API key as a Bearer token:
```bash theme={null}
Authorization: Bearer
```
Workspace API keys are project-specific. The MCP server can only read analytics data for the project attached to the key.
## Setup
Select your client below to configure Formo with API key authentication.
1. On Claude Desktop, go to Settings > Developer > Edit Config
2. This opens the Claude Desktop config file:
* **macOS:** `~/Library/Application Support/Claude/claude_desktop_config.json`
* **Windows:** `%APPDATA%\Claude\claude_desktop_config.json`
3. Add the following configuration:
```json theme={null}
{
"mcpServers": {
"formo": {
"command": "npx",
"args": [
"mcp-remote",
"https://api.formo.so/v0/mcp/",
"--header",
"Authorization: Bearer YOUR_API_KEY"
]
}
}
}
```
4. Restart Claude Desktop for the changes to take effect.
5. Upon successful restart, click the + icon on a new chat screen to enable Formo.
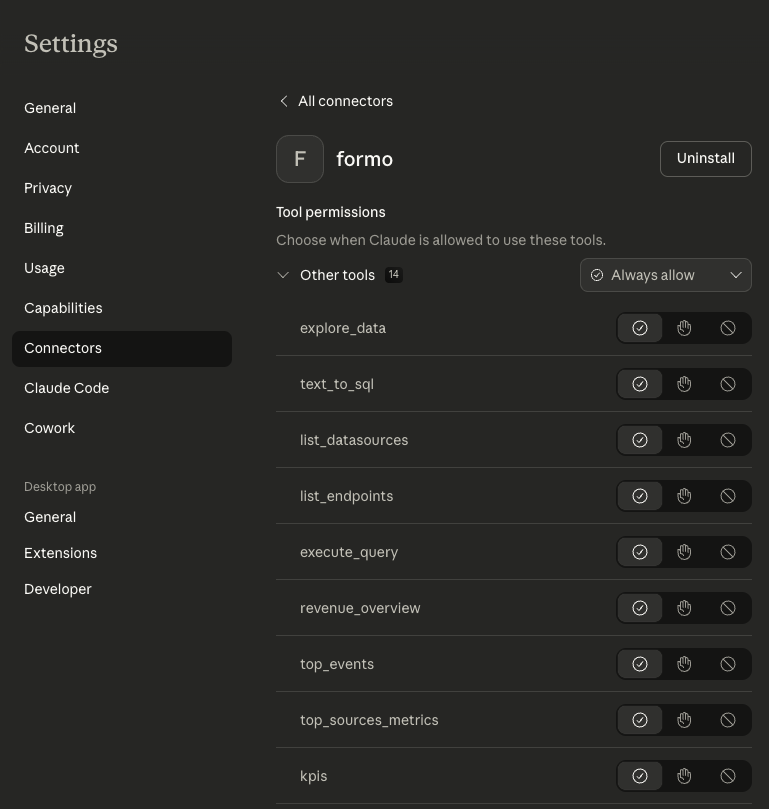
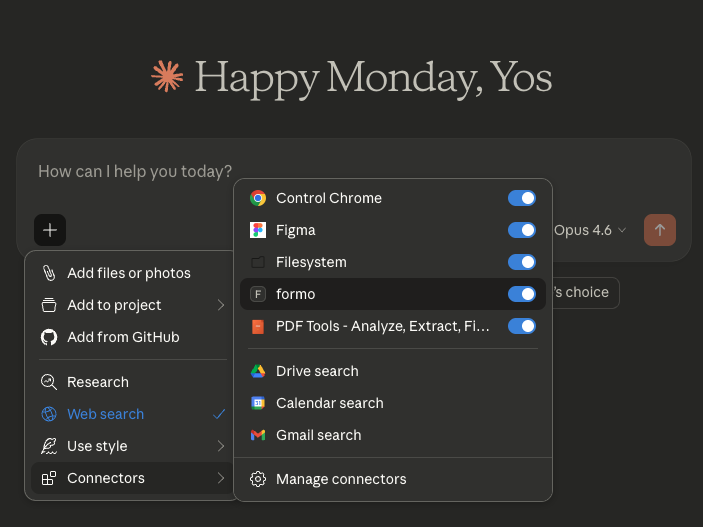 6. You can go to the Connectors settings to configure the Formo connector permissions to Always Allow.
 1. Press `Cmd+,` (macOS) or `Ctrl+,` (Windows/Linux) to open Settings.
2. Find the "MCP" section in the settings sidebar.
3. Click "Add new MCP server" and configure:
* **Name:** `formo`
* **Type:** `sse`
* **URL:** `https://api.formo.so/v0/mcp/`
* **Headers:** `Authorization: Bearer YOUR_API_KEY`
Alternatively, add this to `.cursor/mcp.json` in your project:
```json theme={null}
{
"mcpServers": {
"formo": {
"url": "https://api.formo.so/v0/mcp/",
"headers": {
"Authorization": "Bearer YOUR_API_KEY"
}
}
}
}
```
Run the following command:
```bash theme={null}
claude mcp add --scope user --transport http formo https://api.formo.so/v0/mcp/ --header "Authorization: Bearer YOUR_API_KEY"
```
This registers the Formo MCP server globally for your user. To scope it to a specific project, use `--scope project` instead.
1. Open Windsurf Settings and navigate to the MCP section, or edit `~/.codeium/windsurf/mcp_config.json` directly.
2. Add the following configuration:
```json theme={null}
{
"mcpServers": {
"formo": {
"serverUrl": "https://api.formo.so/v0/mcp/",
"headers": {
"Authorization": "Bearer YOUR_API_KEY"
}
}
}
}
```
3. Restart Windsurf for the changes to take effect.
Add the following to `.vscode/mcp.json` in your project:
```json theme={null}
{
"servers": {
"formo": {
"type": "http",
"url": "https://api.formo.so/v0/mcp/",
"headers": {
"Authorization": "Bearer YOUR_API_KEY"
}
}
}
}
```
Add the following to `~/.codex/config.toml`:
```toml theme={null}
[mcp_servers.formo]
url = "https://api.formo.so/v0/mcp/"
http_headers = { "Authorization" = "Bearer YOUR_API_KEY" }
```
For clients that only support stdio-based MCP servers, use the `mcp-remote` bridge to connect to Formo's HTTP-based server.
1. Ensure Node.js is installed: `node --version`
2. Run the following command:
```bash theme={null}
npx mcp-remote https://api.formo.so/v0/mcp/ --header "Authorization: Bearer YOUR_API_KEY"
```
You can use this with any MCP client that supports stdio transports:
```json theme={null}
{
"mcpServers": {
"formo": {
"command": "npx",
"args": [
"mcp-remote",
"https://api.formo.so/v0/mcp/",
"--header",
"Authorization: Bearer YOUR_API_KEY"
]
}
}
}
```
Most MCP clients support HTTP transport with custom headers. Configure your client with:
* **Server URL:** `https://api.formo.so/v0/mcp/`
* **Header:** `Authorization: Bearer YOUR_API_KEY`
If your client only supports stdio transport, use the `mcp-remote` bridge.
Try prompts you can ask once Formo is connected.
## Troubleshooting
**`403 MCP access requires a Scale or Enterprise plan`:** MCP is available only on Scale and Enterprise plans. A valid API key with the MCP scope is not sufficient on Free or Growth workspaces. [Upgrade your workspace](https://app.formo.so) to connect MCP.
**Tools not appearing:** Verify your API key has the MCP scope enabled. Check that the URL ends with a trailing slash: `https://api.formo.so/v0/mcp/`. Restart your AI assistant after configuration changes.
**Authentication errors:** Ensure the API key is sent as `Authorization: Bearer YOUR_API_KEY`. Check that the API key has not been revoked.
**Wrong project data:** Workspace API keys are project-specific. Create or use a key attached to the project you want the MCP client to query.
**Claude Desktop not connecting:** Ensure Node.js is installed and accessible from the command line. Check Claude Desktop logs: `~/Library/Logs/Claude/` on macOS.
1. Press `Cmd+,` (macOS) or `Ctrl+,` (Windows/Linux) to open Settings.
2. Find the "MCP" section in the settings sidebar.
3. Click "Add new MCP server" and configure:
* **Name:** `formo`
* **Type:** `sse`
* **URL:** `https://api.formo.so/v0/mcp/`
* **Headers:** `Authorization: Bearer YOUR_API_KEY`
Alternatively, add this to `.cursor/mcp.json` in your project:
```json theme={null}
{
"mcpServers": {
"formo": {
"url": "https://api.formo.so/v0/mcp/",
"headers": {
"Authorization": "Bearer YOUR_API_KEY"
}
}
}
}
```
Run the following command:
```bash theme={null}
claude mcp add --scope user --transport http formo https://api.formo.so/v0/mcp/ --header "Authorization: Bearer YOUR_API_KEY"
```
This registers the Formo MCP server globally for your user. To scope it to a specific project, use `--scope project` instead.
1. Open Windsurf Settings and navigate to the MCP section, or edit `~/.codeium/windsurf/mcp_config.json` directly.
2. Add the following configuration:
```json theme={null}
{
"mcpServers": {
"formo": {
"serverUrl": "https://api.formo.so/v0/mcp/",
"headers": {
"Authorization": "Bearer YOUR_API_KEY"
}
}
}
}
```
3. Restart Windsurf for the changes to take effect.
Add the following to `.vscode/mcp.json` in your project:
```json theme={null}
{
"servers": {
"formo": {
"type": "http",
"url": "https://api.formo.so/v0/mcp/",
"headers": {
"Authorization": "Bearer YOUR_API_KEY"
}
}
}
}
```
Add the following to `~/.codex/config.toml`:
```toml theme={null}
[mcp_servers.formo]
url = "https://api.formo.so/v0/mcp/"
http_headers = { "Authorization" = "Bearer YOUR_API_KEY" }
```
For clients that only support stdio-based MCP servers, use the `mcp-remote` bridge to connect to Formo's HTTP-based server.
1. Ensure Node.js is installed: `node --version`
2. Run the following command:
```bash theme={null}
npx mcp-remote https://api.formo.so/v0/mcp/ --header "Authorization: Bearer YOUR_API_KEY"
```
You can use this with any MCP client that supports stdio transports:
```json theme={null}
{
"mcpServers": {
"formo": {
"command": "npx",
"args": [
"mcp-remote",
"https://api.formo.so/v0/mcp/",
"--header",
"Authorization: Bearer YOUR_API_KEY"
]
}
}
}
```
Most MCP clients support HTTP transport with custom headers. Configure your client with:
* **Server URL:** `https://api.formo.so/v0/mcp/`
* **Header:** `Authorization: Bearer YOUR_API_KEY`
If your client only supports stdio transport, use the `mcp-remote` bridge.
Try prompts you can ask once Formo is connected.
## Troubleshooting
**`403 MCP access requires a Scale or Enterprise plan`:** MCP is available only on Scale and Enterprise plans. A valid API key with the MCP scope is not sufficient on Free or Growth workspaces. [Upgrade your workspace](https://app.formo.so) to connect MCP.
**Tools not appearing:** Verify your API key has the MCP scope enabled. Check that the URL ends with a trailing slash: `https://api.formo.so/v0/mcp/`. Restart your AI assistant after configuration changes.
**Authentication errors:** Ensure the API key is sent as `Authorization: Bearer YOUR_API_KEY`. Check that the API key has not been revoked.
**Wrong project data:** Workspace API keys are project-specific. Create or use a key attached to the project you want the MCP client to query.
**Claude Desktop not connecting:** Ensure Node.js is installed and accessible from the command line. Check Claude Desktop logs: `~/Library/Logs/Claude/` on macOS.